2023. 3. 5. 15:00ㆍBlockChain
최근에 작성한 이전 게시물에서 Truffle을 이용하여
MetaMask와 React 환경의 Front를 연결했다
이번에는 거기에 Express 환경까지 연결하여 Axios 통신을 이용해 보도록 한다
먼저 Express환경을 설치할 폴더를 만들어서 다음 명령어를 실행한다
npm init -y이후 필요한 라이브러리를 설치해 준다
npm i express cors truffle web3
truffle 라이브러리가 설치되었다면, 그 환경에 맞게 다음 명령어로 기본 설정을 해줘야 한다
npx truffle init이 명령어가 정상적으로 작동했다면 3개의 폴더 1개의 js 파일이 생성된다
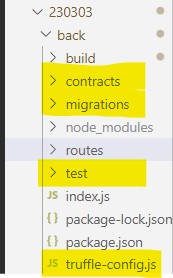
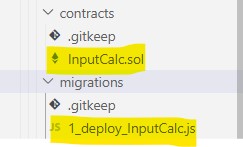
- contracts
- Smart Contract 코드 작성 폴더이다. Solidity언어로 작성한 코드를 여기에 작성하면 된다고 생각하면 편하
- migrations
- 배포 관련된 코드를 작성하는 폴더이다. 작성하는 파일의 제목에 대한 형식이 정해져 있다
(Ex. 번호_내용_컨트랙트명.js)
- 배포 관련된 코드를 작성하는 폴더이다. 작성하는 파일의 제목에 대한 형식이 정해져 있다
- test
- 테스트 코드를 작성하는 폴더이다. Jest 코드
- truffle-config.js
- truffle에 대한 전체 설정이 주석처리 돼서 저장되어 있다
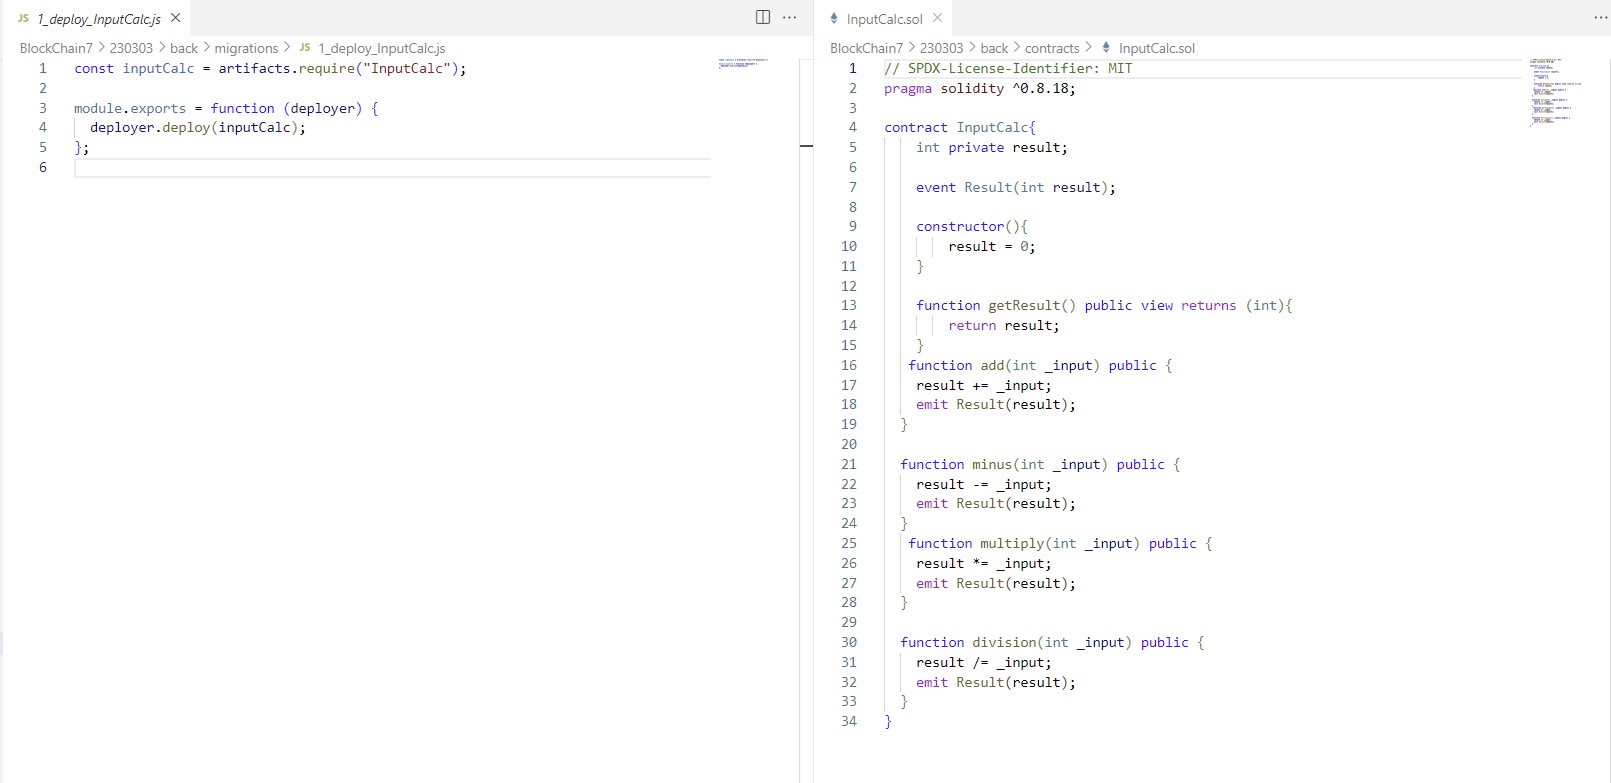
사용할 solidity 코드를 작성한 파일을 contracts폴더에 넣어주고 migrations 폴더에는 만든 solidity 코드의 deploy 파일을 작성해 준다
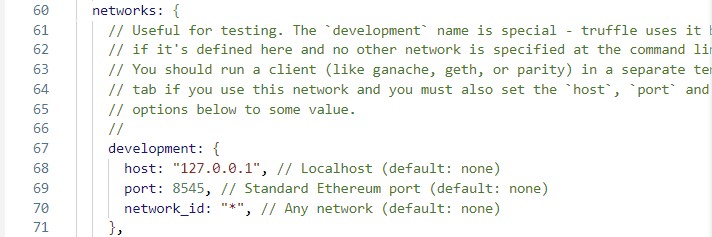
그리곤 config파일 설정 주석되어 있는 것을 해제해주고
ganache를 작동하자
그리곤, npx truffle init 된 환경에서 다음 명령어로 컴파일과 배포를 실행한다
npx truffle compile

npx truffle migration
정상적으로 작동했다면 우리는 build라는 폴더에 contracts내부에 solidity 파일이름으로 된 json형식의 파일을 얻을 수 있다
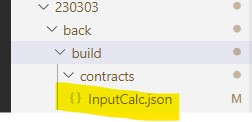
이 JSON형식의 파일을 복사하여서 react 환경에 있는 contracts 폴더에 붙여 놓기 해주자

그리고 난 후 react환경 쪽에서 즉시실행함수 안에 있는 새로운 통신을 통해 만드는 Contract 메서드를 다음과 같이 수정해 준다
// react > Container.jsx

useEffect(() => {
    (async () => {
      if (deployed) return;
      const data = await axios.post("http://localhost:8080/api/op/check");
      const { CA, _deployed, _result } = data.data;
      setDeployed(_deployed);
      setResult(parseInt(_result));

      web3.eth.subscribe("logs", { address: CA }).on("data", (log) => {
        console.log(log);
        const params = [{ type: "int256", name: "inputValue" }];
        const value = web3.eth.abi.decodeLog(params, log.data);
        setResult(value.inputValue);
      });
    })();
  }, []);
// express > index/routes/op.js-
router.post("/check", async (req, res) => {
const networkId = await web3.eth.net.getId();
const CA = InputCalcContract.networks[networkId].address;
const abi = InputCalcContract.abi;
const _deployed = new web3.eth.Contract(abi, CA);
const _result = await _deployed.methods.getResult().call();
res.send({ CA, abi, _deployed, _result });
});- check 경로의 axios 통신을 통해 result 변수의 값을 가져와서 react state로 저장해 준다
- 이후 subscribe메서드로 변화량에 대한 값을 logs, data 이벤트들을 통해 값에 접근해서 이 또한 state값을 변동시켜 준다
subscribe 메서드로 인해서 사칙연산할 때마다 getResult메서드를 통할 필요가 없어진다
따라서 사칙연산 함수들을 다음과 같이 수정해 준다
// react > Container.jsx

const add = async (_input) => {
    const data = (
      await axios.post("http://localhost:8080/api/op/add", {
        from: account,
        input: _input,
      })
    ).data;
    await web3.eth.sendTransaction(data);
  };
  const minus = async (_input) => {
    const data = (
      await axios.post("http://localhost:8080/api/op/minus", {
        from: account,
        input: _input,
      })
    ).data;
    await web3.eth.sendTransaction(data);
  };
  const multiply = async (_input) => {
    const data = (
      await axios.post("http://localhost:8080/api/op/multiply", {
        from: account,
        input: _input,
      })
    ).data;
    await web3.eth.sendTransaction(data);
  };
  const division = async (_input) => {
    const data = (
      await axios.post("http://localhost:8080/api/op/division", {
        from: account,
        input: _input,
      })
    ).data;
    await web3.eth.sendTransaction(data);
  };
exrpess
// express > index/routes/op.js

router.post("/add", async (req, res) => {
  const { from, input } = req.body;

  const nonce = await web3.eth.getTransactionCount(from);
  const networkId = await web3.eth.net.getId();
  const CA = InputCalcContract.networks[networkId].address;
  const abi = InputCalcContract.abi;
  const deployed = new web3.eth.Contract(abi, CA);
  const data = await deployed.methods.add(input).encodeABI();

  const txObj = {
    nonce,
    from,
    to: CA,
    data,
  };
  res.json(txObj);
});

router.post("/minus", async (req, res) => {
  const { from, input } = req.body;

  const nonce = await web3.eth.getTransactionCount(from);
  const networkId = await web3.eth.net.getId();
  const CA = InputCalcContract.networks[networkId].address;
  const abi = InputCalcContract.abi;
  const deployed = new web3.eth.Contract(abi, CA);
  const data = await deployed.methods.minus(input).encodeABI();

  const txObj = {
    nonce,
    from,
    to: CA,
    data,
  };
  res.json(txObj);
});

router.post("/multiply", async (req, res) => {
  const { from, input } = req.body;

  const nonce = await web3.eth.getTransactionCount(from);
  const networkId = await web3.eth.net.getId();
  const CA = InputCalcContract.networks[networkId].address;
  const abi = InputCalcContract.abi;
  const deployed = new web3.eth.Contract(abi, CA);
  const data = await deployed.methods.multiply(input).encodeABI();

  const txObj = {
    nonce,
    from,
    to: CA,
    data,
  };
  res.json(txObj);
});

router.post("/division", async (req, res) => {
  const { from, input } = req.body;

  const nonce = await web3.eth.getTransactionCount(from);
  const networkId = await web3.eth.net.getId();
  const CA = InputCalcContract.networks[networkId].address;
  const abi = InputCalcContract.abi;
  const deployed = new web3.eth.Contract(abi, CA);
  const data = await deployed.methods.division(input).encodeABI();

  const txObj = {
    nonce,
    from,
    to: CA,
    data,
  };
  res.json(txObj);
});
이렇게 하면 Truffle을 이용하여 MetaMask를 React, Express 환경으로 연결할 수 있다
다음은 전체 폴더/파일 경로이다.

'BlockChain' 카테고리의 다른 글
| (BlockChain) Token (0) | 2023.03.06 |
|---|---|
| (BlockChain) Solidity 문법(1) (0) | 2023.03.06 |
| (BlockChain) MetaMask와 Front(React) 연결 (0) | 2023.03.03 |
| (BlockChain) Truffle (0) | 2023.03.02 |
| (BlockChain) JS에서 Solidity 및 Smart Contract 실행 (0) | 2023.02.28 |